Barcode Automation
Important Notice - In June 2024, we released a new version of our Inventory system. Updated documentation for the Inventory is available in our new Support Portal. All documentation for the entire eLabNext platform will be fully migrated to the new Support Portal over the course of 2024. Start using the new Inventory documentation.
You can generate barcodes to work with an HID type of 2D barcode scanner to automate many sample handling processes such as updating sample information, updating quantities and archiving samples. Using the barcode scanner, you can then first scan a sample. Once the sample is displayed on your desktop screen you can subsequently scan the generated action barcode to perform an action on the scanned sample. To use the Barcode Generator go to Marketplace and install and activate the Barcode Automation add-on
Navigate to Barcode Generator in the Configuration menu.

Single Sample Actions
With the Barcode Generator, you can currently create barcodes to perform the following actions on single samples:
- Remove sample - removes the scanned sample from the lab inventory
- Remove sample series - removes the scanned sample series from the lab inventory
- Change quantity - add, subtract, set, clear a sample quantity with a defined amount
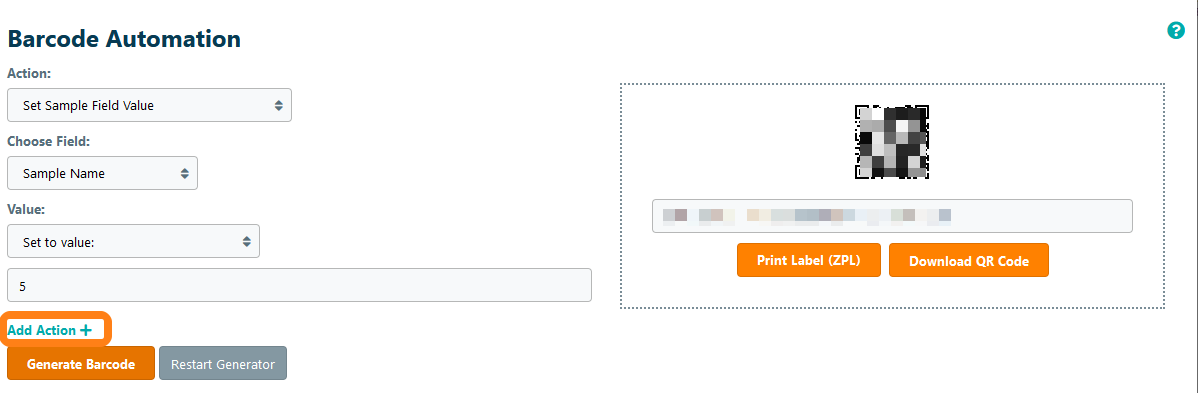
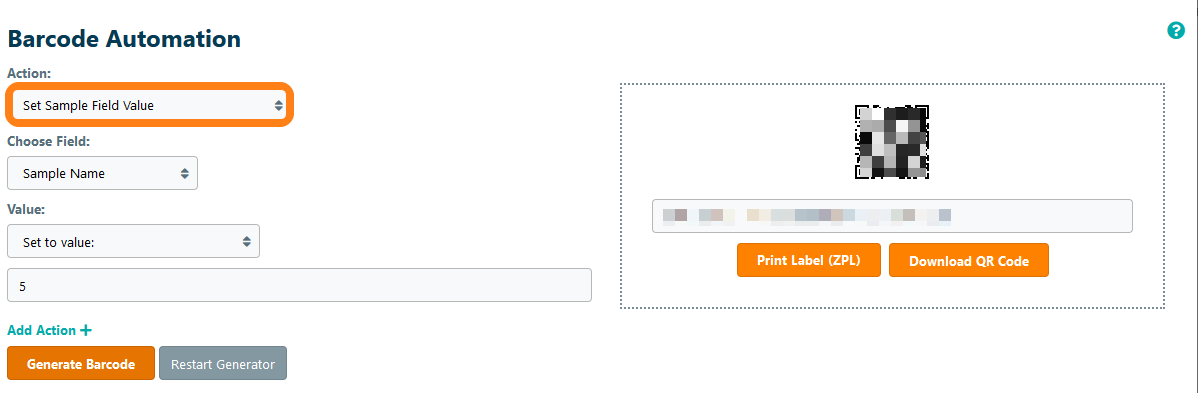
- Set sample field value - change the information the selected sample specification field to either a scanned value (i.e a barcode) or a predefined value in a sample.
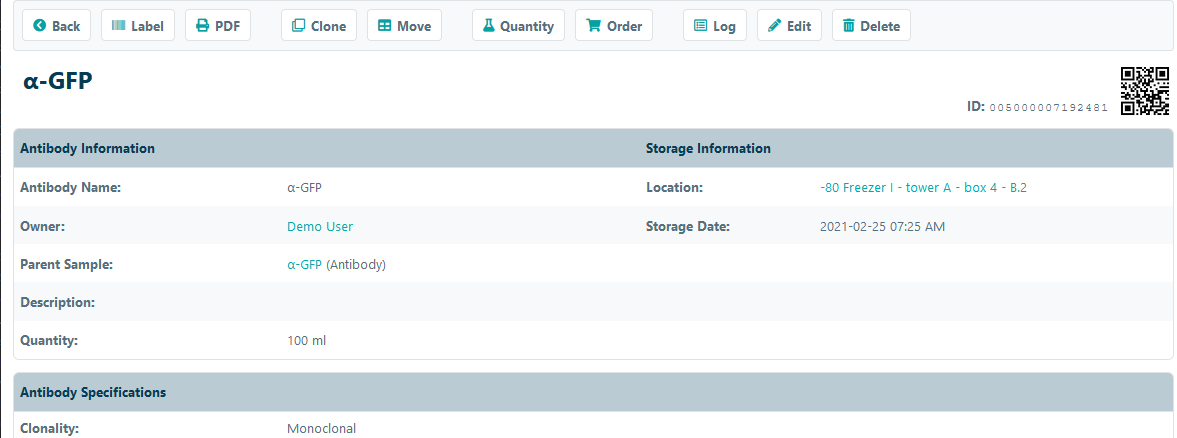
Note that many actions performed with the generated barcodes assume that the sample on which the action is executed is visible on the screen of your desktop PC. This means that in most situations you first need to navigate to the sample on which you want to perform the scan action (this can be done by first scanning the sample barcode).
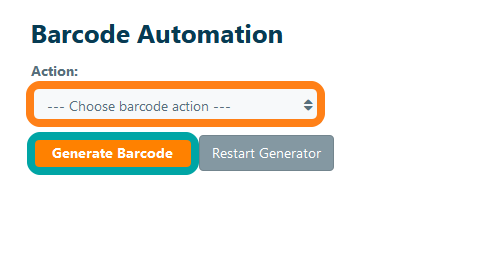
To create a barcode, select the Action in the drop down menu and click Generate to get the barcode.
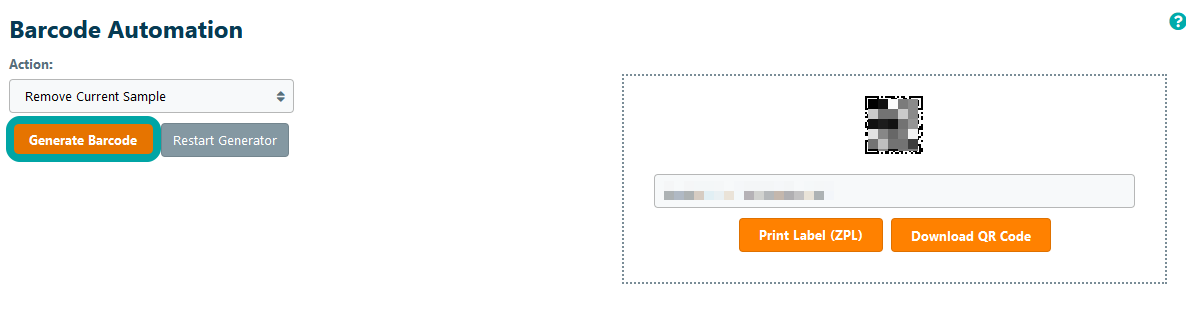
The barcode can be printed using a ZPL Printer or Downloaded. After this is done, you can navigate to the desired sample to perform the action, either by first navigating to the sample or by scanning the sample barcode. Once the sample information sheet is displayed, you can scan the action barcode.
After executing the action, a toast message is shown to confirm that the action has been executed.
Multiple Sample Actions
With the Barcode Generator, it is also possible to update multiple samples with the same value using a single scan action. You can currently create a barcode to update multiple samples for the following action:
- Set sample field value - change information of a selected sample specification field to a predefined value of multiple samples.
To create a barcode to update multiple samples, select the corresponding Action in the dropdown menu and click Generate to get the barcode.
When scanning the generated barcode, a pop-up menu will appear allowing you to scan samples that should be updated with the chosen value during the barcode configuration.
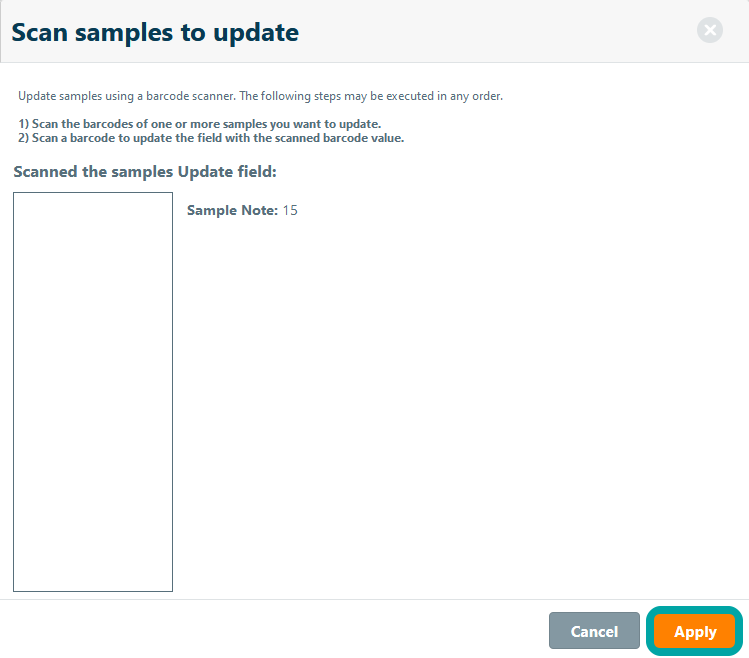
Note that multiple sample actions do not require you to first navigation to a sample to perform the action, because the actual samples that are updated are scanned in the displayed workflow.
Chaining barcode-mediated sample actions
With the barcode generator, it is also possible to configure a barcode that executes multiple actions. In this way you will be able to update multiple fields using a single scan action. The different actions will be chained into one barcode and processed accordingly.
Creating a chained barcode is supported when the following barcode action is used:
- Change quantity - add, subtract, set, clear a sample quantity with a defined amount
- Set sample field value - change the information the selected sample specification field to either a scanned value (i.e a barcode) or a predefined value in a sample.
If one of the supported fields is selected the option 'Add Action +' will become available. When configuring a barcode that can perform multiple actions you can update multiple sample properties in a single barcode scan or clear a sample quantity and archive the sample in a scan single action. Chaining barcodes is also supported when updating multiple samples by performing a scan action.