Tasks
Streamline processes within your lab with Tasks. With this add-on, you can create and assign tasks to users as well as track their status. Users automatically receive a notification when a task is assigned to them. Assigned tasks are listed on the dashboard to raise awareness for any pending tasks. Note: the current iteration of Tasks does not support audit trails.
Tasks introduces a new icon in your account's toolbar. Click the Tasks button to open the Tasks management panel.

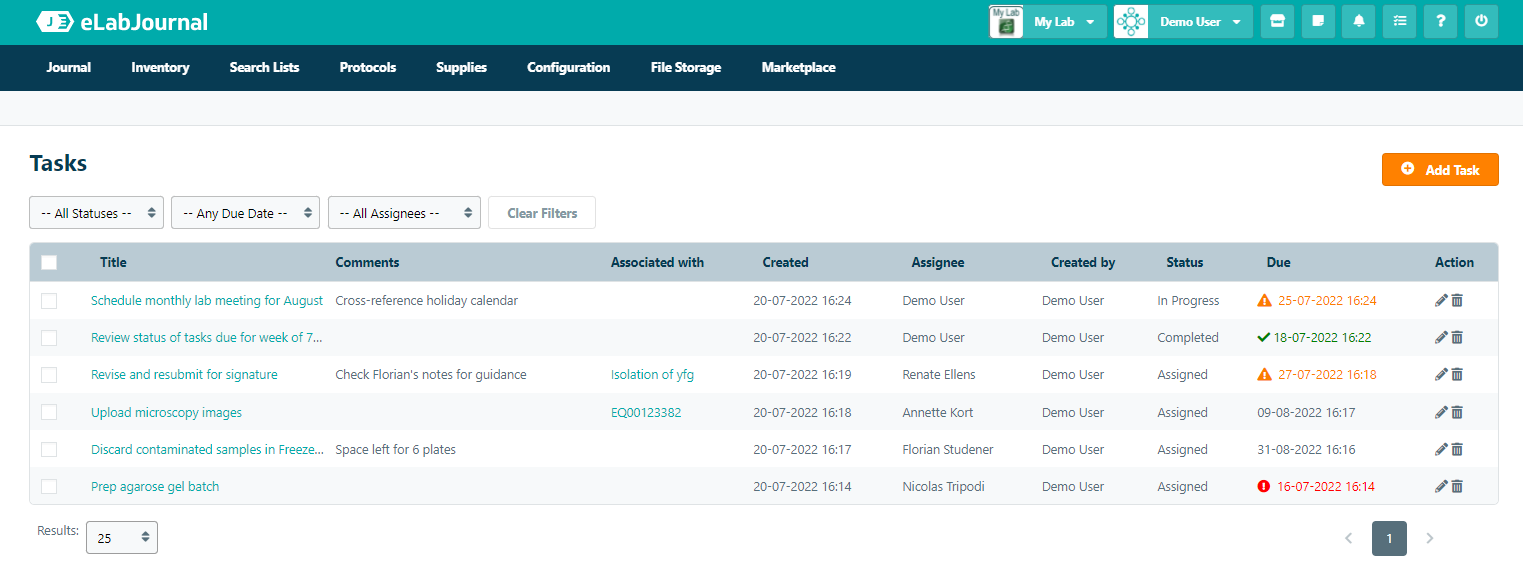
Within the management panel, users can create new tasks, view their task list, and update the status of tasks.
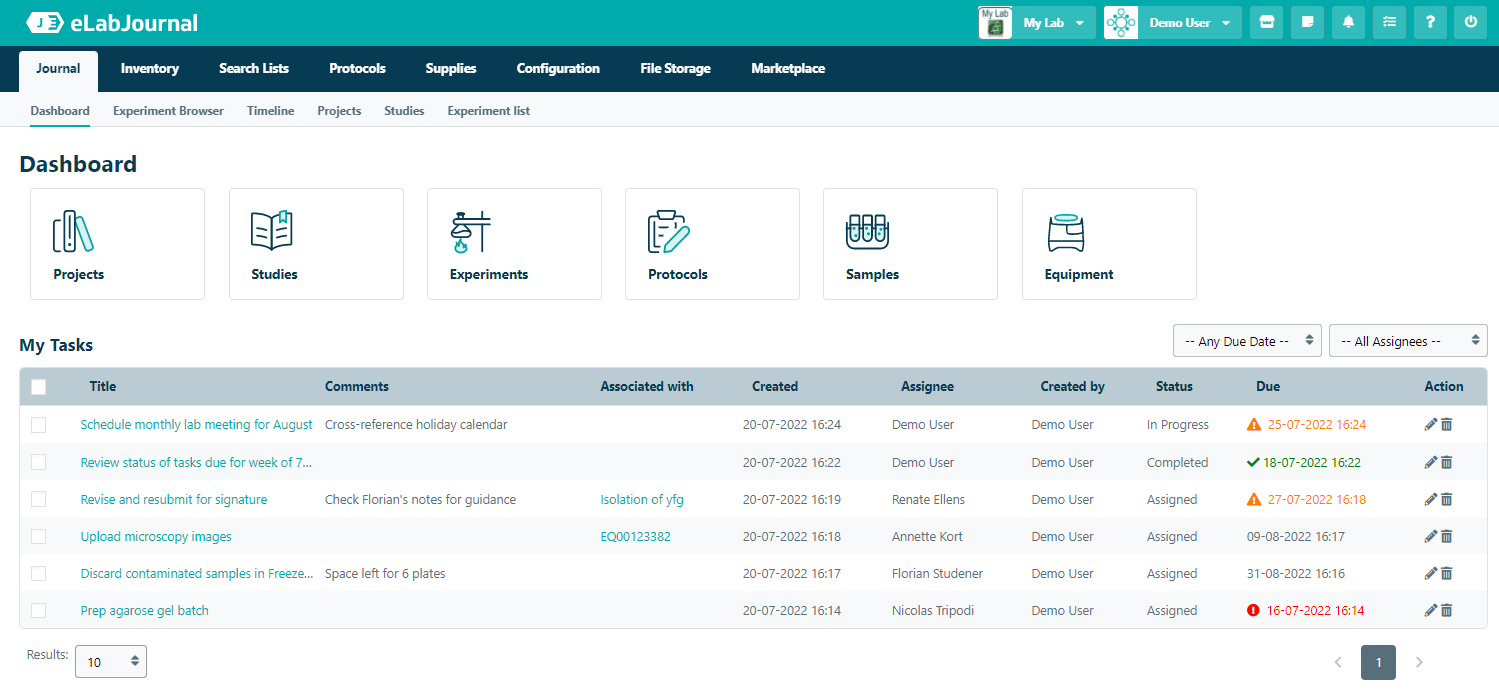
Additionally, users can also view and manage their task list from the Dashboard when they log into eLabProtocols.
Creating a Task
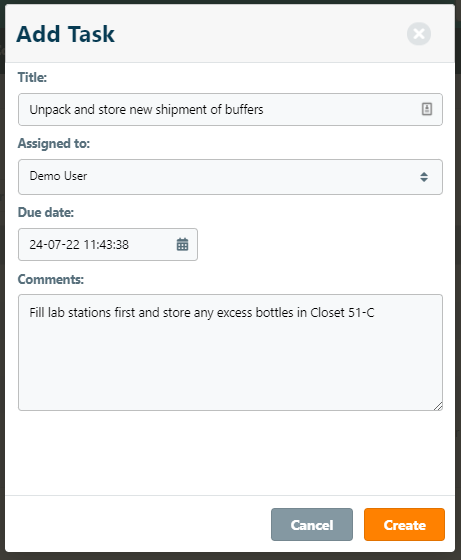
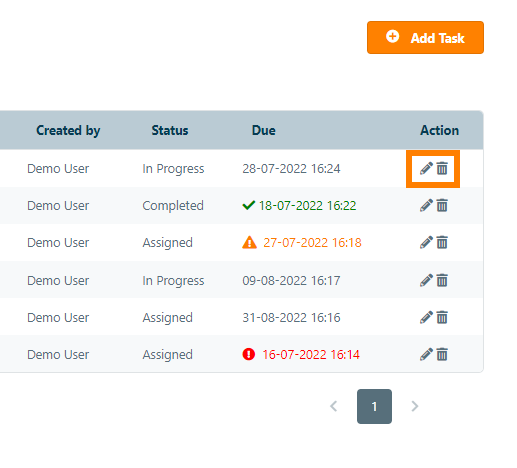
To create a new task, navigate to the Tasks panel and click Add Task.

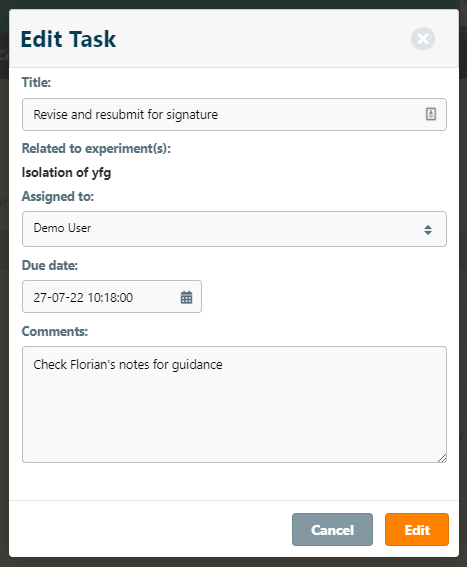
In the pop-up window, you can input data for the following fields:
- Title (required) – name of your task
- Assigned to (required) – user who is being assigned the task
- Due date – date when task needs to be completed
- Comments – additional information about the task
Once you have filled in the necessary fields, click Create to add your new task.
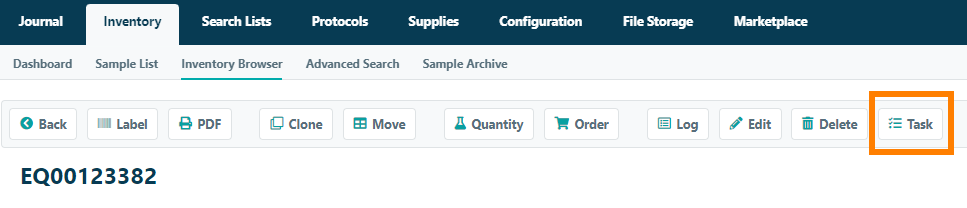
Users can also create tasks that are associated with a specific sample. To create a task for a sample, navigate to the sample's details page and click the Task button. Once the task has been created, a link to the sample will be listed in the Associated with column on the Tasks panel.
Note: creating an associated task for an object does not add a creation record for the task to the object's audit trail.
Viewing Tasks
Users can view the list of tasks assigned within the group by navigating to the either Tasks management panel or the Dashboard. Note: only tasks that have been created by or assigned to the user can be viewed in the task list.
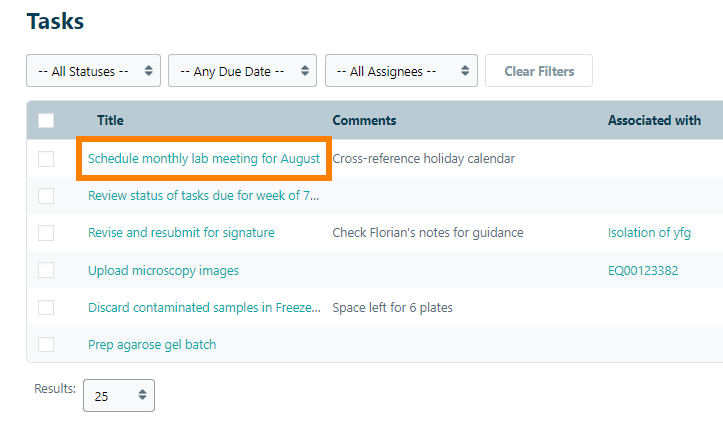
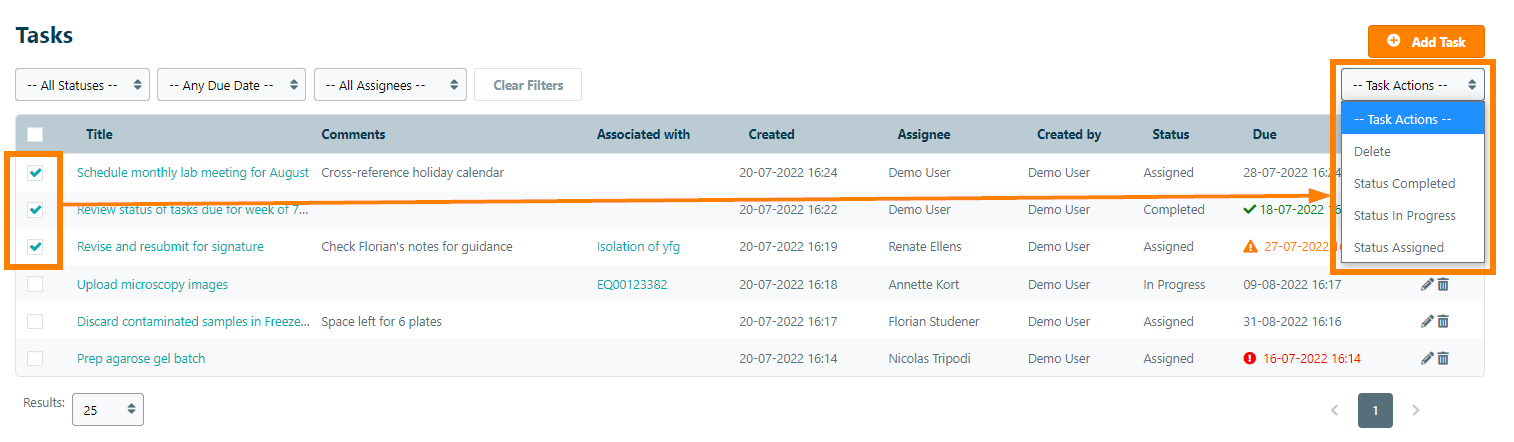
The following fields are visible within the task list:
- Title – name of your task
- Comments – additional information about the task
- Associated with – link to the sample or experiment with which a task may be associated
- Created – timestamp when the task was created
- Assignee – user who is has been assigned the task
- Created by – user who created the task
- Status – tracks progress on completing the task (Green formatting indicates a complete task, Orange is due within 7 days, and Red is past due)
- Due – date when task needs to be completed
Users can further organize the task list by setting the filter dropdowns for Status, Due Date, and Assignee, or by clicking a column's header to sort by that column alphabetically.
Updating a Task
To edit information for an existing task, users can select the icons listed in the Action column of the task list.
Click the Edit icon to open the Edit Task window. Users can update the title, assign the task to a new user, change the due date, or edit the comments section. Click the Edit button to apply these changes.
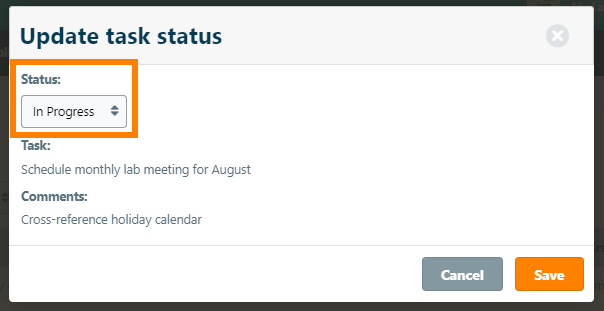
To update a task's status, click the title link in the task list.
In the Update task status window, select the new status value from the dropdown list and click Save to apply.
The status field can also be updated for multiple tasks using the Bulk Action dropdown. Mark the checkboxes for the tasks you want to update to reveal Bulk Actions dropdown. Choose the desired status from the dropdown to update the status of the selected tasks.
Deleting a Task
Tasks can be deleted by clicking the Delete icon listed under the Actions column in the task list. Alternatively, you can delete tasks in bulk by marking the checkboxes for the tasks you want to delete and selecting the Delete option from the Bulk Actions dropdown.