Create Sample Import Template
To import of samples, start with the creation of an import template which is specific for the group and sample type. Navigate to the Import tab in the System Admin panel and open Create Import Template.
Select the Group in the system to which you want to import samples, select the Sample Type relevant sample type and click Download Import Template. Optionally, you can also include the storage units or compartments in the import template by selecting them and clicking on Add Compartments to Template prior to downloading the Import Template. It is only required to select the highest comparment level when generating the export template (i.e. Selecting only "-80 Freezer I" adds all compartments to the export template.
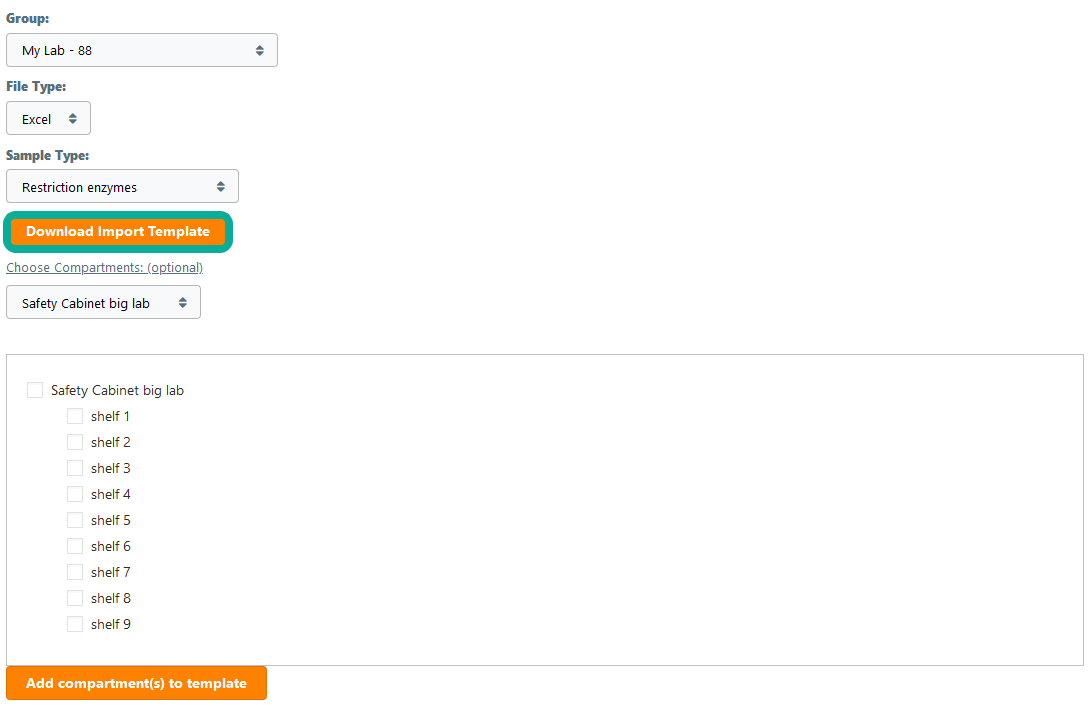
The import template file is generated as a Excel file, that can be used for the import. Optionally you can choose to generate the export template in CSV format.
The downloaded import template is specific for the selected group and sample type. This information is stored in the name of the file (e.g. SamplesImportTemplate_24_228.xlsx). It is important not to remove this information from the template name. You may append an additional title to the name of the template, but that should not contain any other numbers special characters or spaces. We generally recommend to keep the file name identical
In the import template, any existing data can be transferred into the Excel file to the correct locations and subsequently be migrated using the sample import.
Important General Note: Prior to migration of samples, the group in which samples should appear, and their corresponding sample type should be defined. In case samples should be imported into a storage location, also these items should be created.